Erm, Hello!
I know, I know. In the last post I said I’ll not procrastinate writing the next one. And here I am, after ten whole days. Well, ten days is a lot better than twenty, no? 😀
Actually, I’m on a vacation, sort of. I’m at my parents’ place and trust me, you have to see this place to believe how green and beautiful and quiet it is. Add that to the fact that I have to do absolutely nothing here, and you can understand why writing did not really seem very inviting. Nevertheless, I could not keep off the thoughts of gardening even though I am physically away from my garden.
So here I am, with another post. I welcome you back to the somewhat lazy, somewhat tiring, but never boring world of my garden and its adventures. This post is as much as a bucket list of things I want to try in my garden as it is of things you can try out if you wish to. The list was actually very very long, so this is the part one of an n part series (Read: I don’t know how many parts). n is a natural number, of course.
I am not a thrifty person, but I do love a DIY project (Do-It-Yourself for the uninitiated). I was always interested in painting and art and craft; and I love the opportunity and the satisfaction of turning something that is practically junk into something pretty or even remotely useful. Add to that my gardening mania and spritz some masala and there we are 🙂
Anything around the house can be used for this purpose, as long it can hold soil and has drainage holes. If it doesn’t have drainage holes, you’ll have to drill some, so ensure you choose something appropriate for drilling and have the proper equipment. These projects serve so many purposes – you save something from being trashed, make it pretty and get the satisfaction of refurbishing it, you bring a punch of colour and texture and interest to your garden and break the monotony of the boring old terracotta. You can even involve your kids in these projects, these are perfect to fit in over a weekend. They do something creative, learn to appreciate plants and nature and stay out of your hair! 😀
So let’s dive straight into some of the things around the household that I’d love to (and am going to) plant in, and see if you can try them out.
Please click on the images to enlarge them.
Old tyres:
Sounds weird? Don’t be taken aback, this list is going to get much more weird as we go down further. So, tyres. Everyone has cars, and everyone has a flat tyre that needs to be replaced. We usually throw the bad ones away or leave them at the garage where we get them changed. This time, bring them back and grow some gorgeous plants. How? See below:
If you have a yard, or any space in the ground, you can put your plants in the ground and use the tyres as a kind of fence. You can paint them in any bright colours you want. Look at how lovely that looks. (Cheat tip: You can even hide your old terracotta pots behind your tyres, as long as they’re not taller than the height of the tyre)

Image source: http://www.countryliving.com/gardening/garden-ideas/g2286/10-upcycled-items-that-can-be-repurposed-into-diy-planters/
For people like me, however, who live on higher floors and only have a balcony; there is another way of using tyres. Hang them vertically! You can hang them from a tree, or from the ceiling or anywhere, really. Just poke a few holes in the rubber, cover with coconut coir or moss or jute cloth (burlap) and plant. You can paint it or leave it as it is. Black provides lovely contrast against brightly coloured flowers!

Image source: http://www.coupons.com/thegoodstuff/15-upcycled-planters/

Image source: http://www.curbly.com/users/mollymc/posts/13691-roundup-7-creative-upcycled-planter-ideas
Fruit Strainers (Colanders):
Most of us use these fruit strainers in the kitchen. Some of you may know them as colanders. Well they are basically baskets made of steel/copper with holes for aeration, and are used to store fruits on tables or to drain out water from vegetables after washing them. Most of us have them and often plan on replacing them with newer ones but don’t want to throw the old ones because they aren’t totally gone beyond redemption. Well now we don’t have to! This is a container with built in drainage holes, and we only have to line it up with mulch (Coconut coir, moss or jute cloth/burlap) to cover the holes so the soil doesn’t fall out. And then, plant away!
As with the tyres, the original material has its own charm so you can leave it as it is. You can also paint it in any desirable colour to bring out the colours of your flowers or just to hide the rust or discolourations. Some of us love the discolourations, so it’s all up to you!

Image source: http://www.countryliving.com/gardening/garden-ideas/g2286/10-upcycled-items-that-can-be-repurposed-into-diy-planters/

Image source: http://redesignreport.com/diy-upcycled-planters-earth-day/

Image source: http://www.curbly.com/users/mollymc/posts/13691-roundup-7-creative-upcycled-planter-ideas

Image source: http://www.apartmentapothecary.com/photo/recycled-planters/

Image source: http://themicrogardener.com/clever-plant-container-ideas/
Go ahead and fill your old strainers up! It cannot get easier than this, you don’t get such readymade-for-planting pots easily in the house!
Soft drink bottles:
Yes, you heard me right. You can plant in soda bottles too 🙂 You can cut them in half and use the bottom half after poking some holes. You can plant in the top half, and use the bottom half to store water and assemble them together to make a self-watering container. You can cut out a window in the middle of the bottle and plant, and then hang the bottle horizontally, or vertically.

Image source: http://experthometips.com/2015/03/20/recycle-reuse-5-pretty-uses-for-plastic-drinks-bottles/
Look at those lovely kitties. You can make this easily by cutting the bottle and using the bottom portion. Paint it up and make this for your children, or better still, involve them 🙂 They will love to have this on their desks. You can make one for your own office desk or kitchen window too!

Image source: http://lifehacker.com/5913914/turn-a-soda-bottle-into-a-worry-free-self-watering-planter
Cut the bottle in half and screw the lid on. Make a hole in the lid and take a piece of string through it. Now plant in the top portion of the bottle and fill the bottom half with water, lower the first half in it so that the wick is in the water and you have it 🙂 The wick will suck the water up by capillary action and keep the soil moist, you won’t need to water this plant 🙂 Keep refilling the bottom half as needed.

Image source: http://www.decoist.com/2014-02-10/upcycle-into-planter/

Image source: http://www.scjohnson.com/en/green-choices/Reduce-and-Recycle/Articles/Article-Details.aspx?date=13-04-10&title=DIY-Hanging-Planters
The above two pictures show the window method. The only difference would be in the location of the drainage holes. So cut out a window, make proper drainage holes and hang then vertically or horizontally!
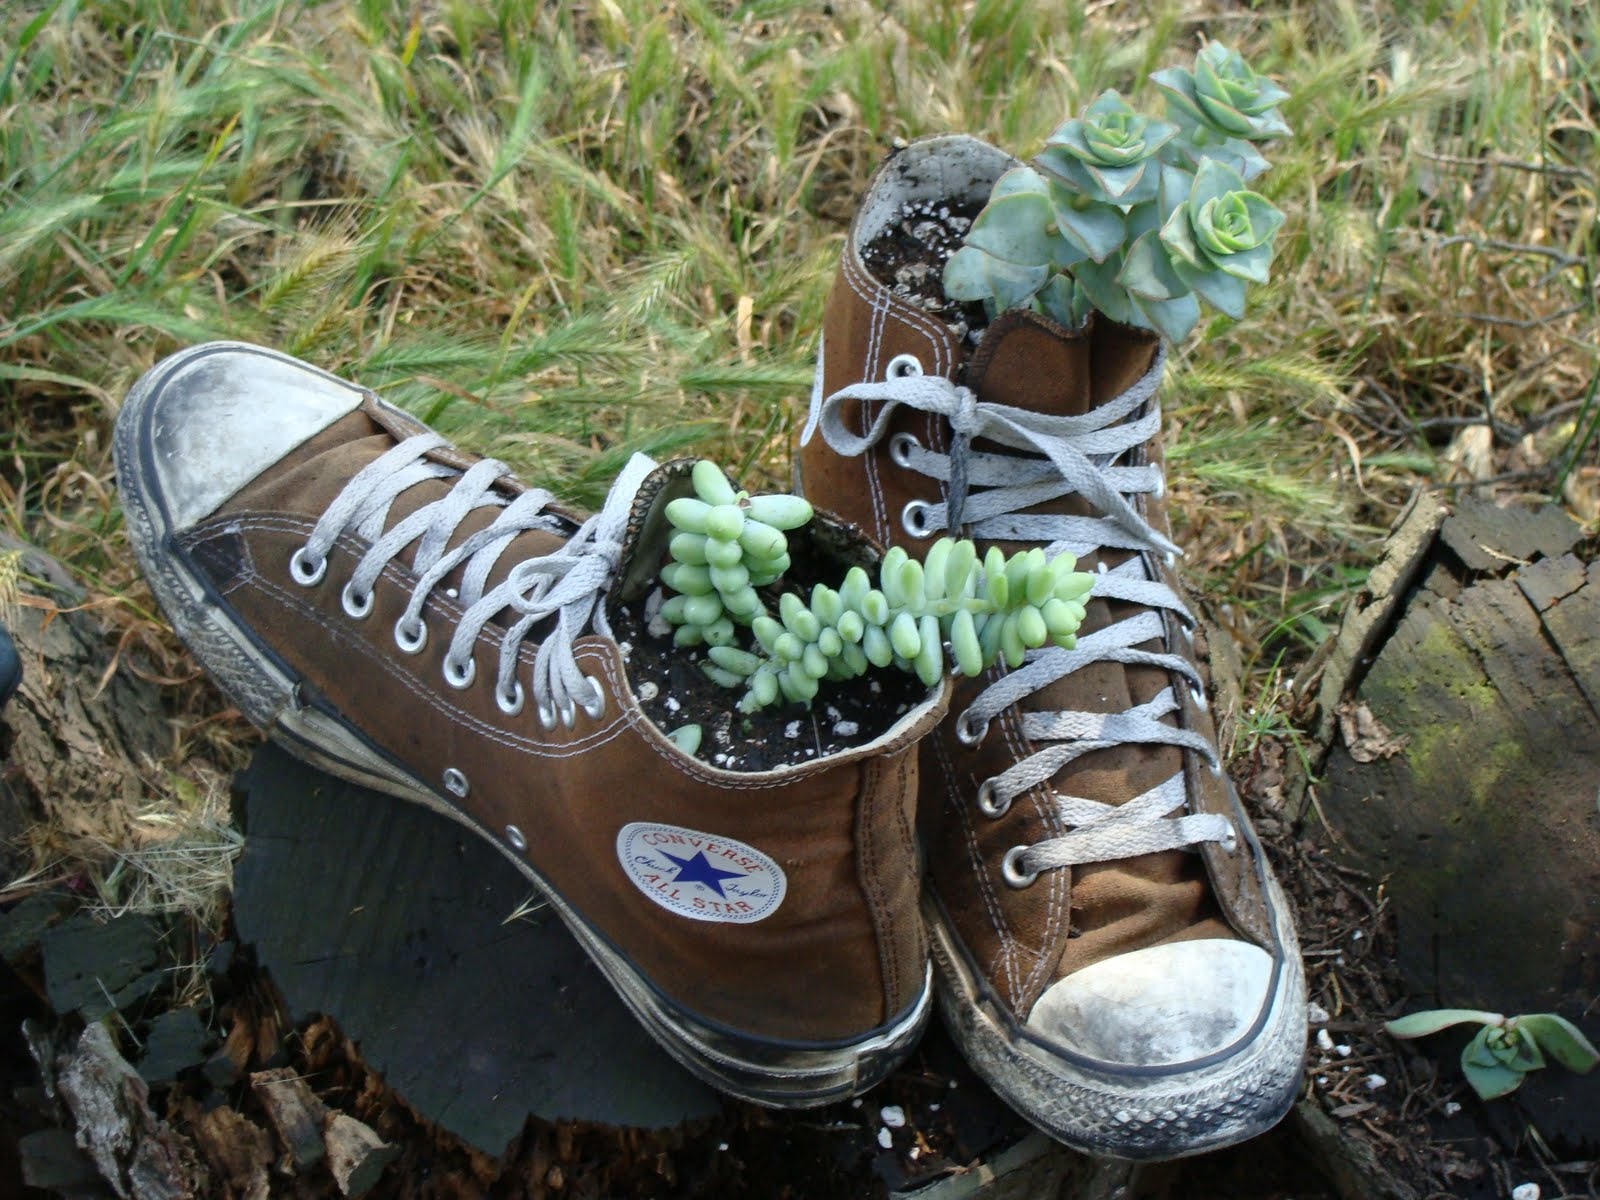
Shoes:
Didn’t I tell you it was going to get more strange? Yes, I’m talking about old shoes. You wore them out, or simply don’t like them anymore, or kids grew out of them – you don’t know what to do with them. The best way is, of course, to donate them to the needy if the shoes are in good shape. However, if they aren’t really great to give away, or you can’t manage to for some reason, that’s no excuse for throwing them in the trash! Just poke a plant in them 🙂
You only need to make a few drainage holes and you’re good to go. Boots, running shoes, toddlers’ and children’s shoes and even high heeled ladies’ shoes – ALL can be planted up!

Image source: http://www.diynetwork.com/how-to/outdoors/gardening/upcycled-container-gardens-planters-and-vases-pictures

Image source: http://i2.wp.com/theverybesttop10.files.wordpress.com/2013/02/the-world_s-top-10-best-images-of-plants-in-shoes-4.jpg?resize=500%2C500

Image source: https://sustainabilityatspu.files.wordpress.com/2014/05/shoe-planter.jpg

Image source: http://1.lushome.com/wp-content/uploads/2012/04/recycled-crafts-planters-backyard-ideas-1.jpg

Image source: https://plantinghappinessblog.files.wordpress.com/2013/04/planting-happiness-urban-gardening-2013-plants-in-baby-shoes.jpg?w=611
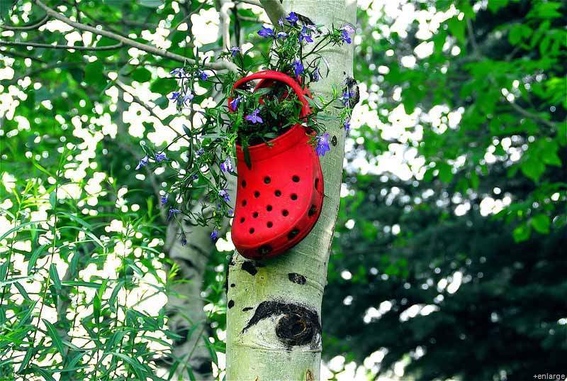
The combination of red crocs with blue flowers is very smart.
Image source: http://www.curbly.com/users/mollymc/posts/13691-roundup-7-creative-upcycled-planter-ideas

Image source: http://www.fleamarketgardening.org/2013/01/29/flea-market-containers-if-it-will-hold-dirt/
I have a pair of old black formal shoes that I don’t use anymore. I’m definitely going to plant something tiny and bright in it 🙂 So what are you waiting for? Dig out those old shoes and get planting!
Tea cups:
It’s getting stranger…. Old crockery. Most of us have crockery that is lying gathering dust in a kitchen closet. Out mothers used to use proper tea sets, but we’re the large coffee mug generation. We even have our tea or chai in those large mugs that hold litres of it 😛 Most of these crockery pieces have still not lost their patterns and glaze and can’t be used anymore because a piece of the set broke or simply because no one uses them anymore. But that’s no reason to waste or worse throw them!
Reuse them for little plants and add interest and a live centrepiece to your tables. This will definitely be a conversation starter! You can plant anything in a cup – matching colours, contrasting colours, flowers or foliage.

Image source: http://www.houseofhawthornes.com/spring-table-decor/

Image source: http://theinspiredroom.net/2013/03/11/indoor-house-plants/

Image source: http://www.gomakeme.com/2013/02/go-make-me-tea-cup-plantings-diy-project.html

Image source: http://thekavicliving.weebly.com/diy/diy-creative-planters-for-your-garden
You will need to drill holes in the tea cups, of course. Ensure you use a drill for this and do not try to hammer a nail in or you will end up breaking your cups most certainly.
Birdcages:
How do I begin and what do I say about birdcages…. The day I got my first set of plants, I went online to read about some of them and stumbled upon a picture of succulents in a birdcage on the website of “The empress of dirt”.
It was so beautiful that I wanted to see more and more and wouldn’t rest until I bought a cheap birdcage from the nearby thrift market. I didn’t like the rough brass finish so I bought oil wall distempers and painted it black. I read more and more about how people planted in birdcages and had my base ready.
But, I didn’t have enough plants 🙂 I was being too hasty and ambitious. You can’t have six plants in pots and expect to fill up a huge birdcage with them. And so, the birdcage became a decorative accessory until I have enough to fill it up with! 🙂
Birdcages aren’t very easily found in most homes, but they aren’t too rare either. You can easily buy one from a thrift store for almost peanuts if you like the idea and want to make one. Do NOT order them online on e-commerce sites unless you have to, they’re very expensive. If you can spare some time on a couple of weekends, you’ll find a cage at a pet shop or maybe at a steel utensils shop. If you have an old or vintage birdcage, by all means use it 🙂 If you had a feathery friend in it earlier, make sure you clean it very thoroughly with detergent and then antiseptic liquid too.

Image source: http://empressofdirt.net/succulent-garden-ideas/

Image source: http://craftgawker.com/post/2014/05/13/65204/

Image source: https://thedoublelifehousewife.wordpress.com/totally-diy/vintage-birdcage-planter/
Most of these birdcages in the pictures open at the top. However it is difficult to find such cages in India. If you’re lucky enough to find one where you live, there will be no issues while planting. If you can’t, you must ensure that the window in the cage is large enough for your hand to go in and move about comfortably and no wires poke or scratch you.

Image source: http://dee-vidabela.blogspot.com/2014/07/diybirdcage-planter.html
Cheat tip: If you have a cage like the one shown above, you can also put in a potted plant directly instead of planting in the cage. Just hide it behind some mulch 🙂
To plant in the cage, you’ll have to take an approach similar to that of a strainer. Just cover the base with mulch, put in your soil and plants 🙂

Image source: https://www.pinterest.com/pin/173036810654933343/
Awaiting the day when my cage will fulfil its destiny 🙂
A few points to be kept in mind while recycling household items as planters:
* Take care of the size of the plant with respect to the size of the container. The plant should have room to grow, it shouldn’t be squished in.
* Take into account the watering needs of the plants while choosing containers. High water craving plants aren’t suited well for shoes or even a cage because it will be hung.
* Keep in mind that metal becomes very hot and very cold and it can hurt your plants in extreme weather. Do not place such containers out in direct sun or in extremely cold weathers.
So that concludes part 1 of this multi-part series. Go ahead, get inspired, and bring that much needed change and youth in your garden and inside your home too 🙂
Do let me know your views in the comments and also, which ones you’re going to try. I really love to hear from the readers 🙂
Until we meet again; keep loving, keep living, keep planting!

it is very interesting and educating. I like this post very much 🙂
LikeLiked by 1 person
🙂
LikeLike
Where there is a will there is a way……if u are fond of plants u can grow them anywhere…thankyou for giving such easy practical options.
LikeLiked by 1 person
🙂
LikeLike